WEEK 5: Press, Trim, & Catch Up
This week is all about doing some block finishing steps, catching up, and resting. I, for one, am going to be recovering from QuiltCon. It was so awesome to meet some of you Omega QAL-ers in the booth, thank you for stopping by and saying hi!
Below is the full six-week schedule for a review. We are getting so close to the end!
WEEK 1 (Jan 30): Fabric selection, prep templates
WEEK 2 (Feb 6): Cut strips, strip piece all units
WEEK 3 (Feb 13): Cut & piece all Block A (Cut all and piece half of Block C, Improv only)
WEEK 4 (Feb 20): Cut & piece all Block B (Piece half of Block C, Improv only)
WEEK 5 (Feb 27): Pressing, trimming & catch-up week
WEEK 6 (Mar 6): Assembly
Before we dive in, let’s talk about prizes. The Week 4 random winner was @shared_yarns, woo!
This week, our prize sponsors are Sewing Arts, a fabric shop in LA, CA, and Sew Fine Thread Gloss, a beeswax based scented (and unscented) thread conditioner to help tame your unruly threads. One lucky person will win a $100 (!!) gift card to Sewing Arts and a set of 3 thread glosses from Sew Fine (winner’s scent choice from available selection).
All participants can also use discount codes generously provided by Sew Fine Thread Gloss, Autumn Moon Quilting, Stitch Lab Quilting, Thai Charm LLC, and Wild Phil Quilting to save some money on fabric/supplies/longarm quilting. Be sure to scroll to the end for all the prize/discount info!
CLIP SEAMS/PRESS BLOCKS (all versions)
We briefly talked about pressing a few posts ago, but let’s go over it again.
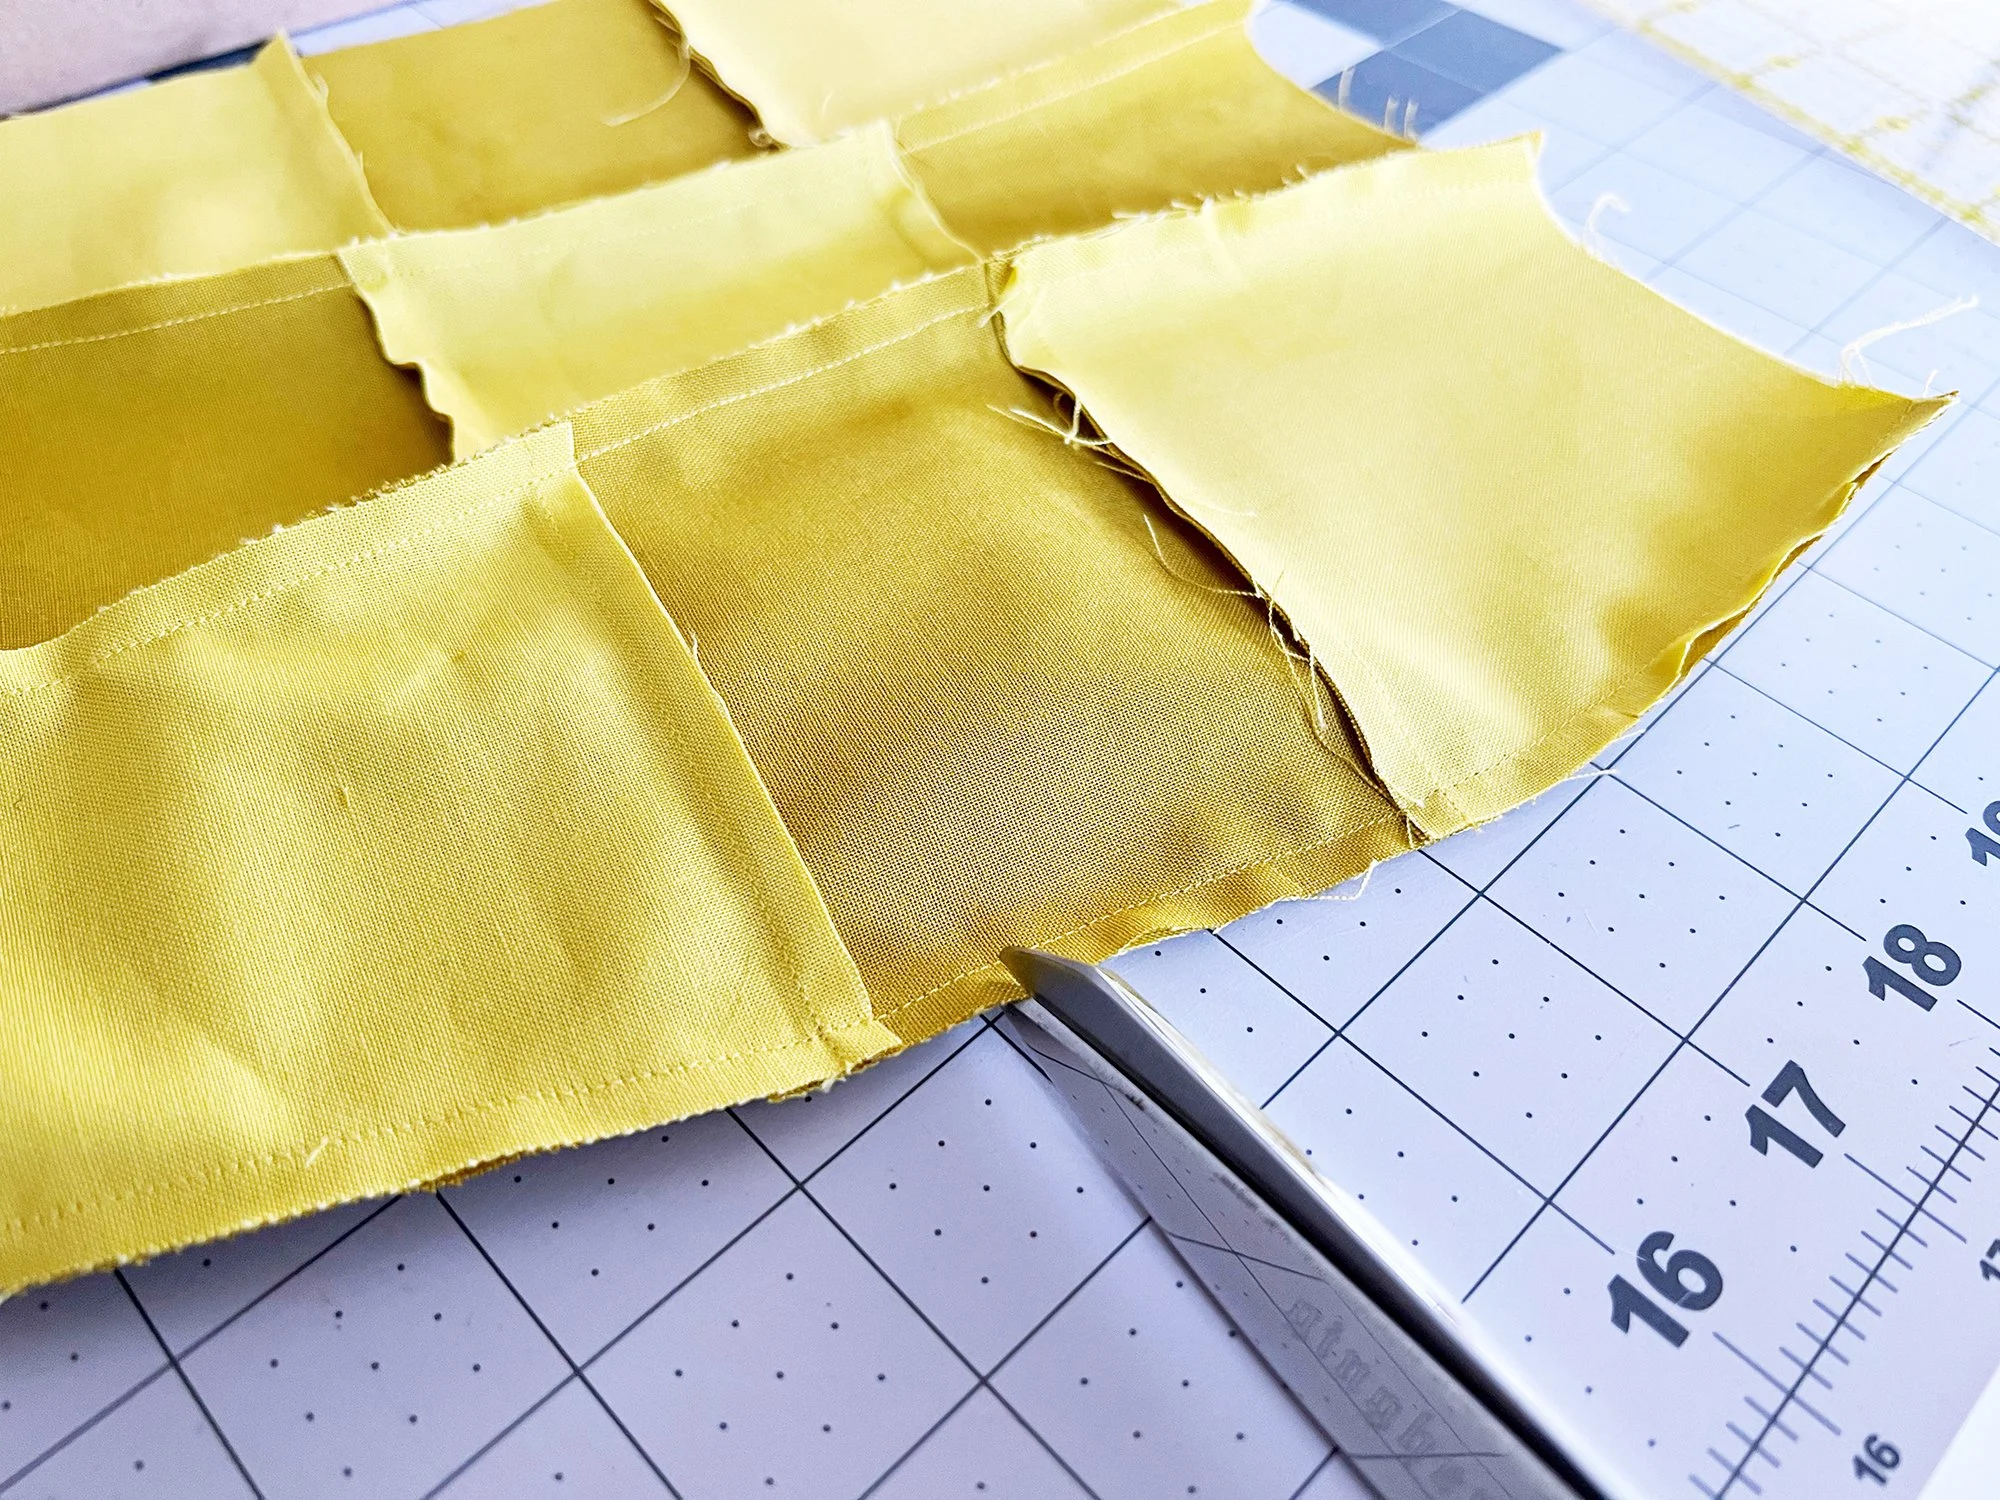
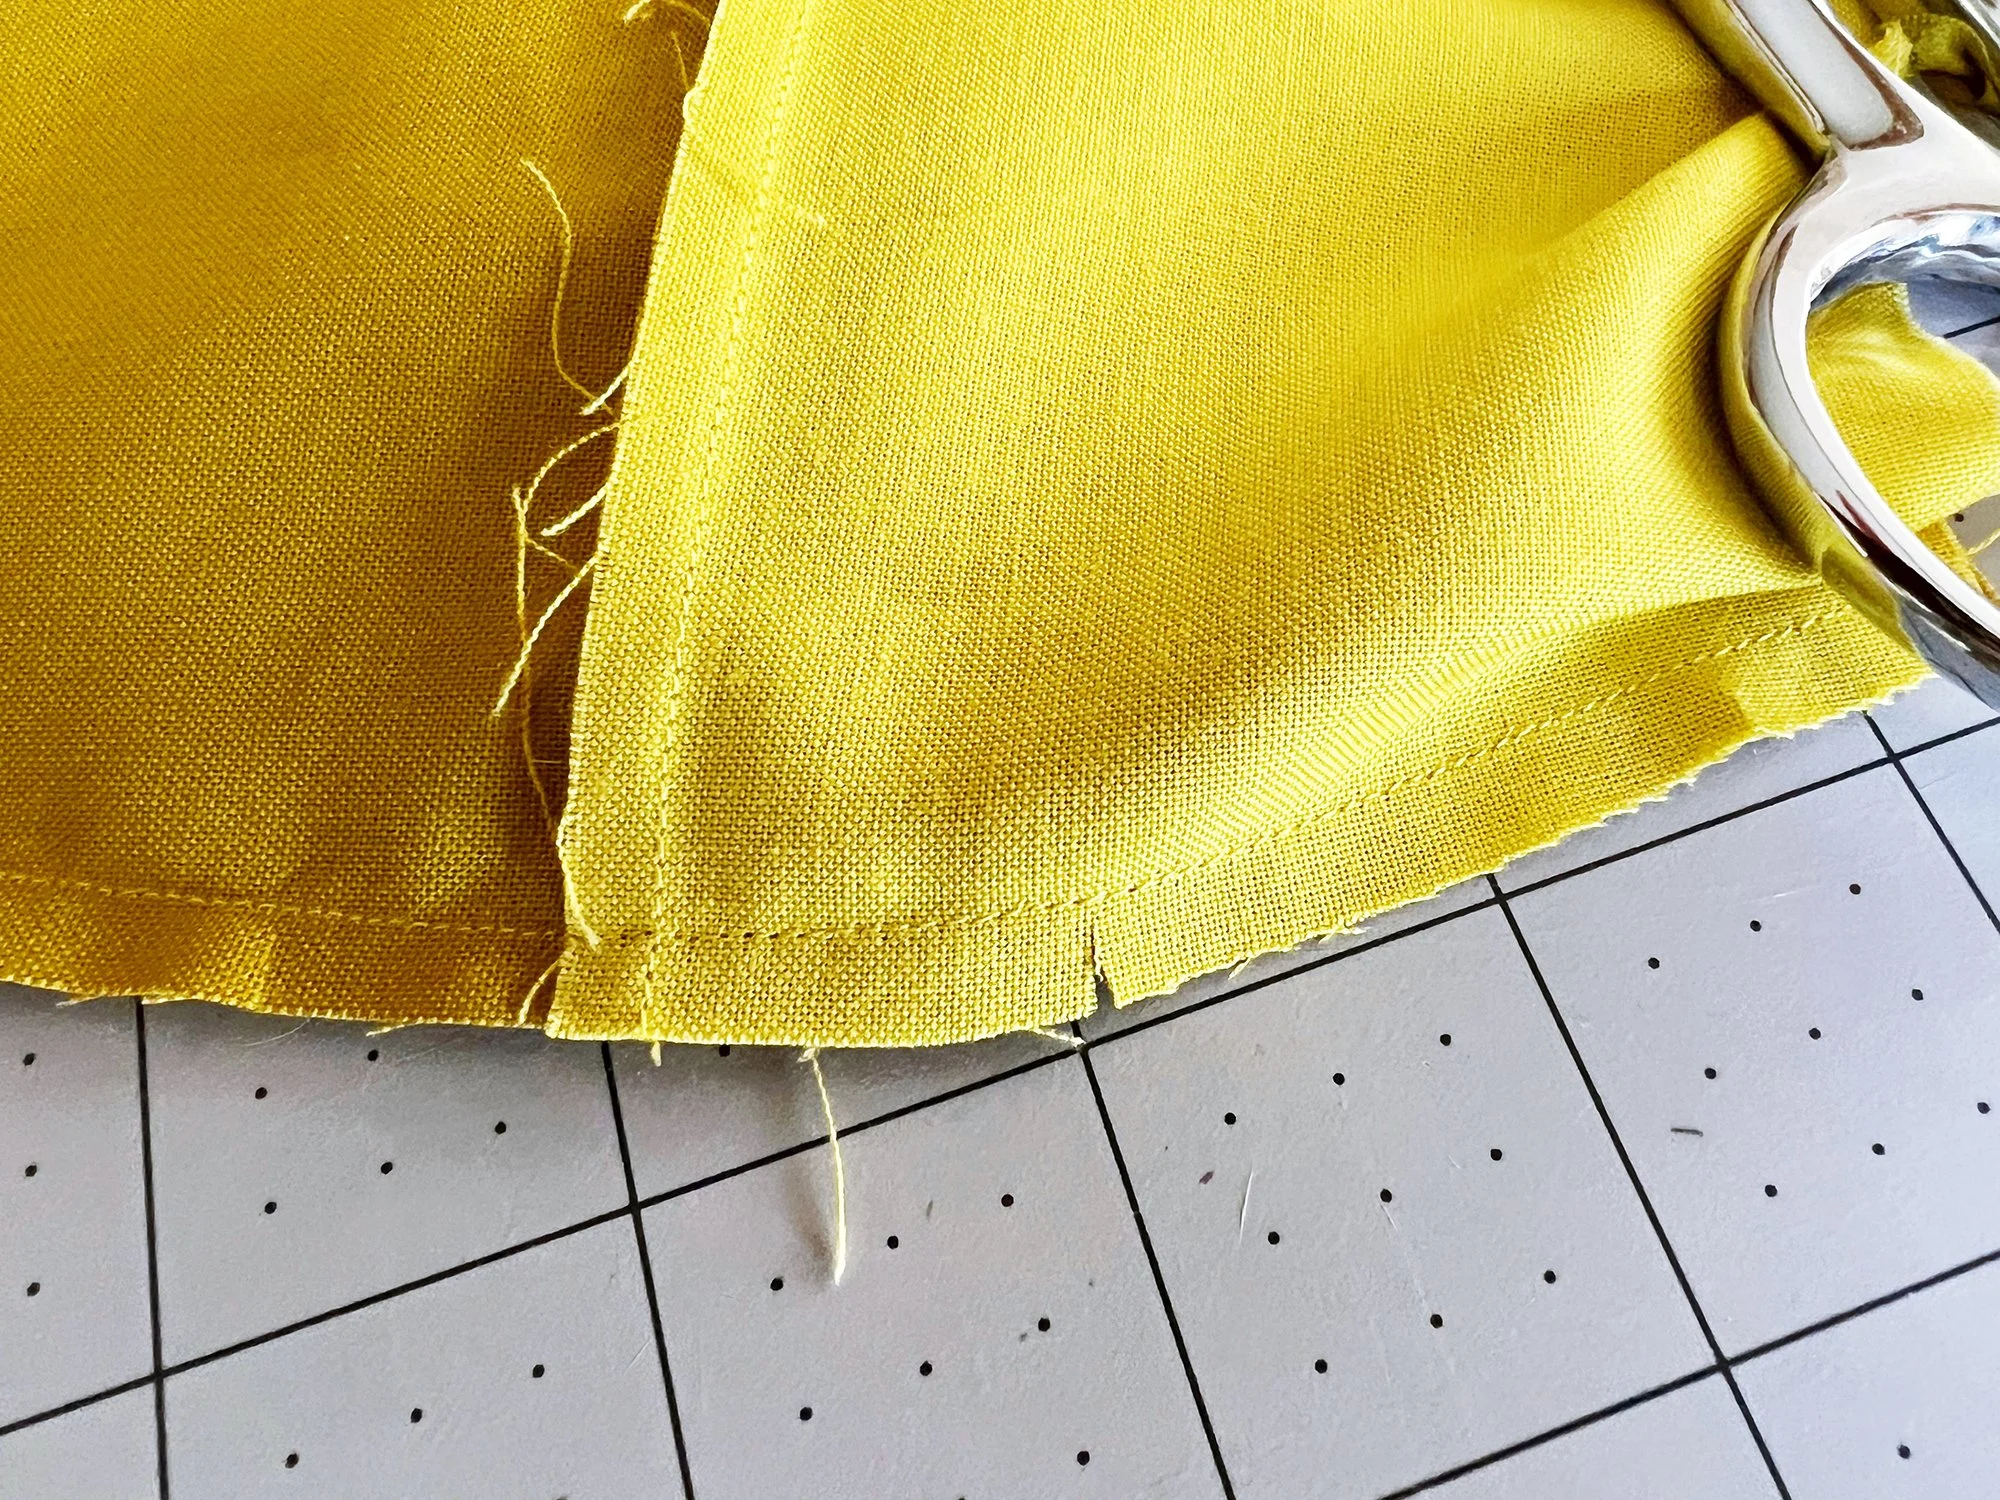
First, on the wrong side of all your blocks, clip into the curvy seam allowances every 1.5” or so. I like to hold my other hand under the seam while clipping to make sure I’m not accidentally cutting through a part of the block I can’t see. Clip close to but not through the stitching as sewn. The clipping will release the curves so that the seam allowances can spread out where they need to to lay flat when you press. If you skip this step, it’s likely you’ll get some puckering when you try to press wherever there is a concave edge.
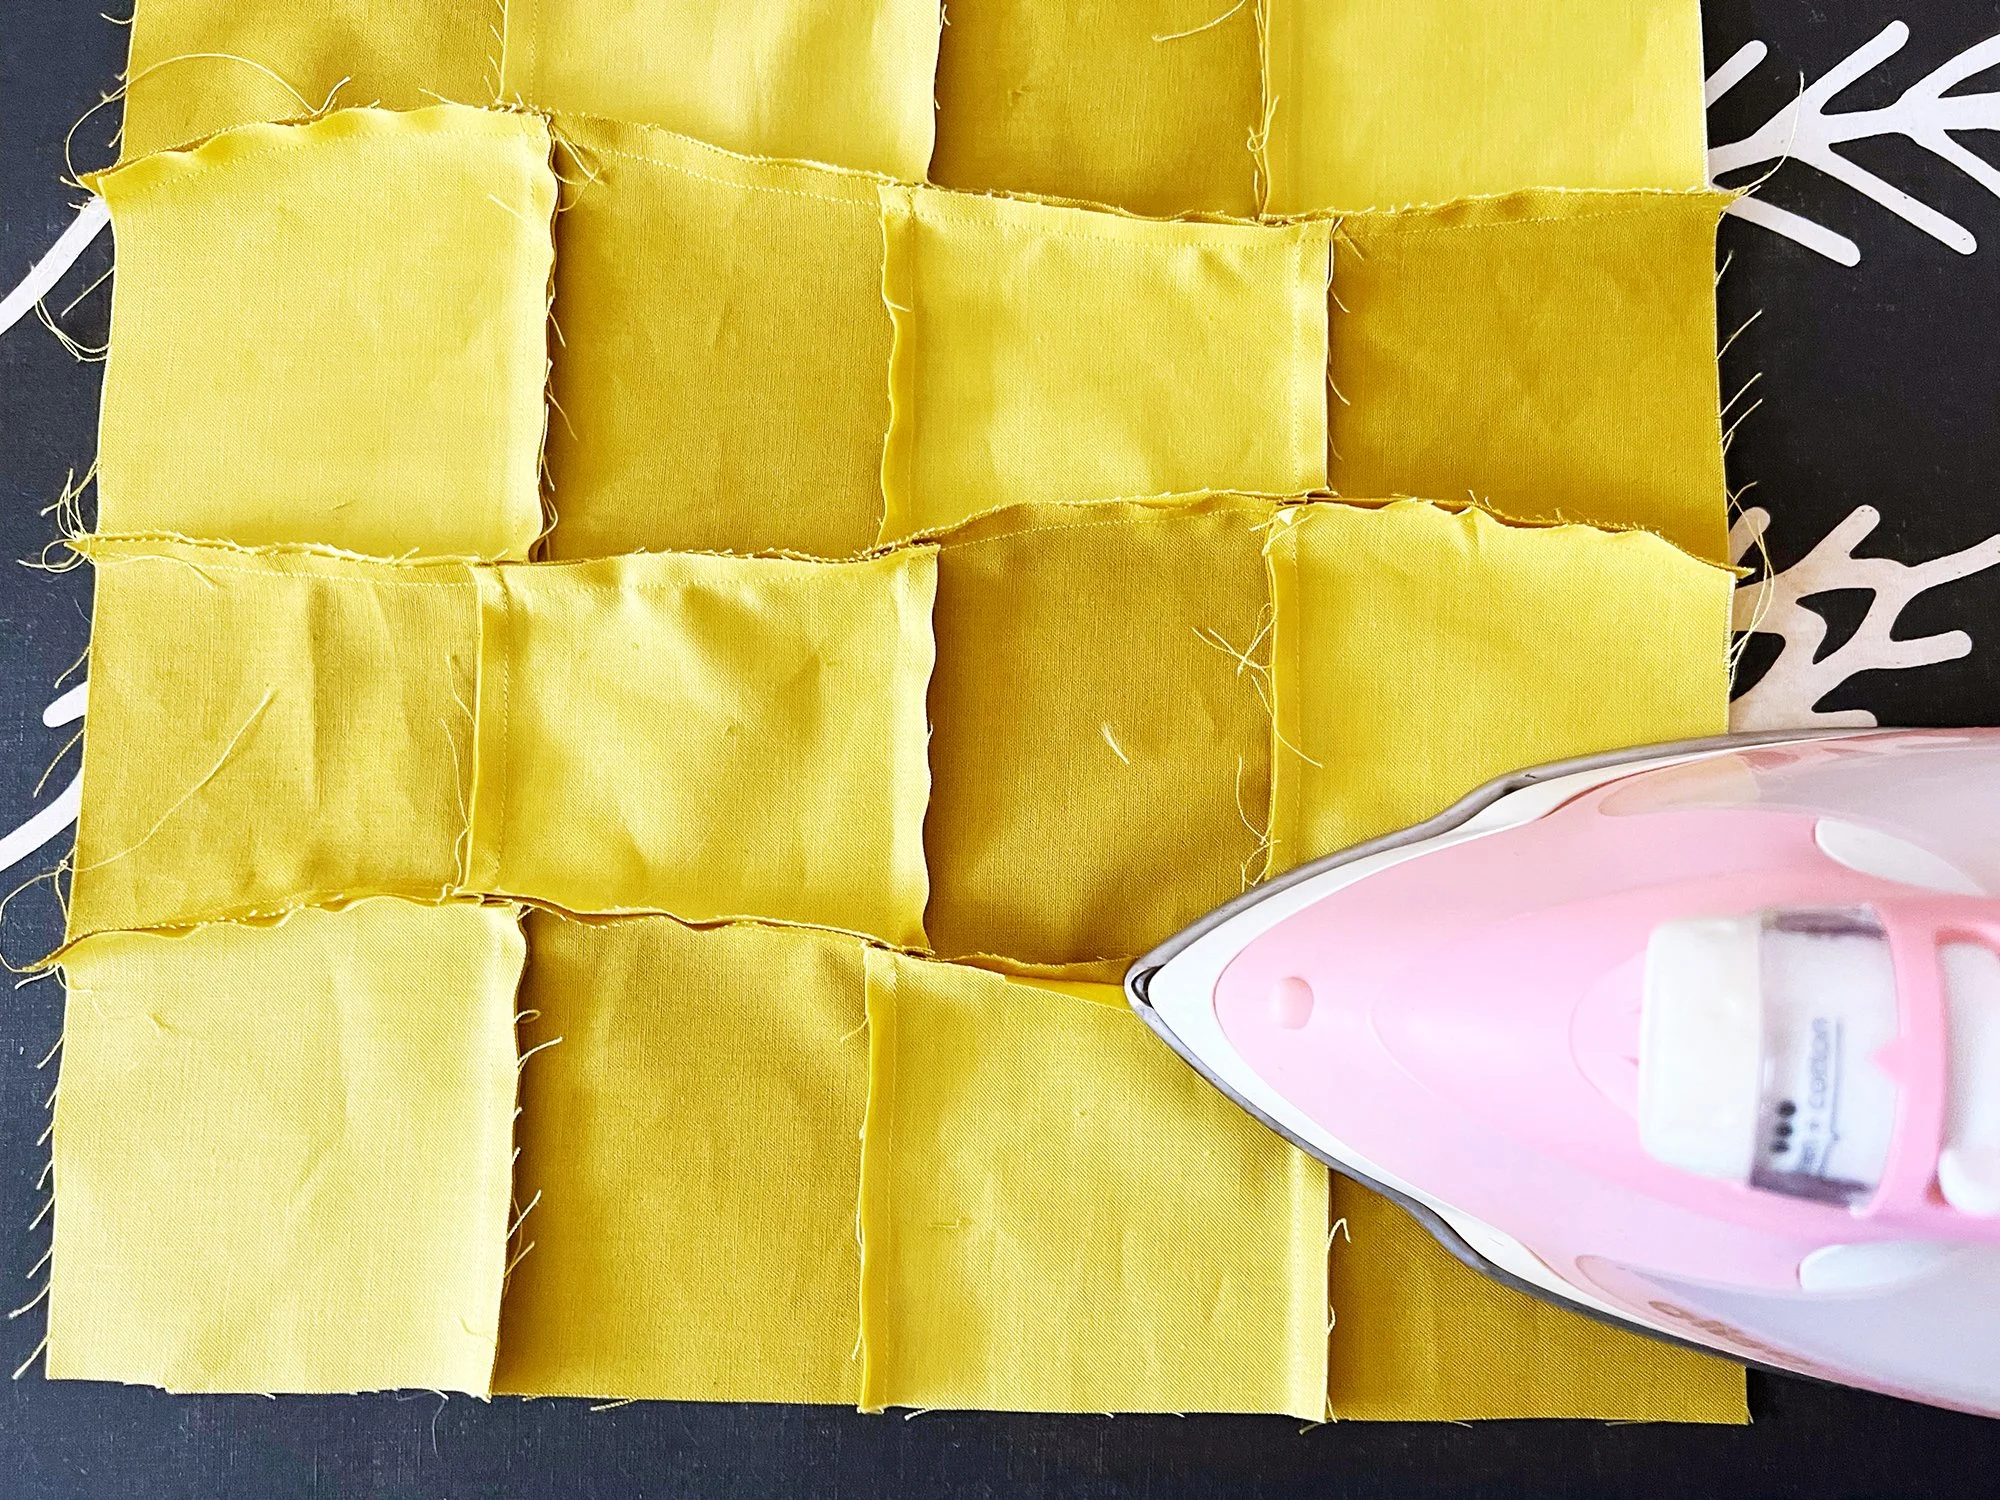
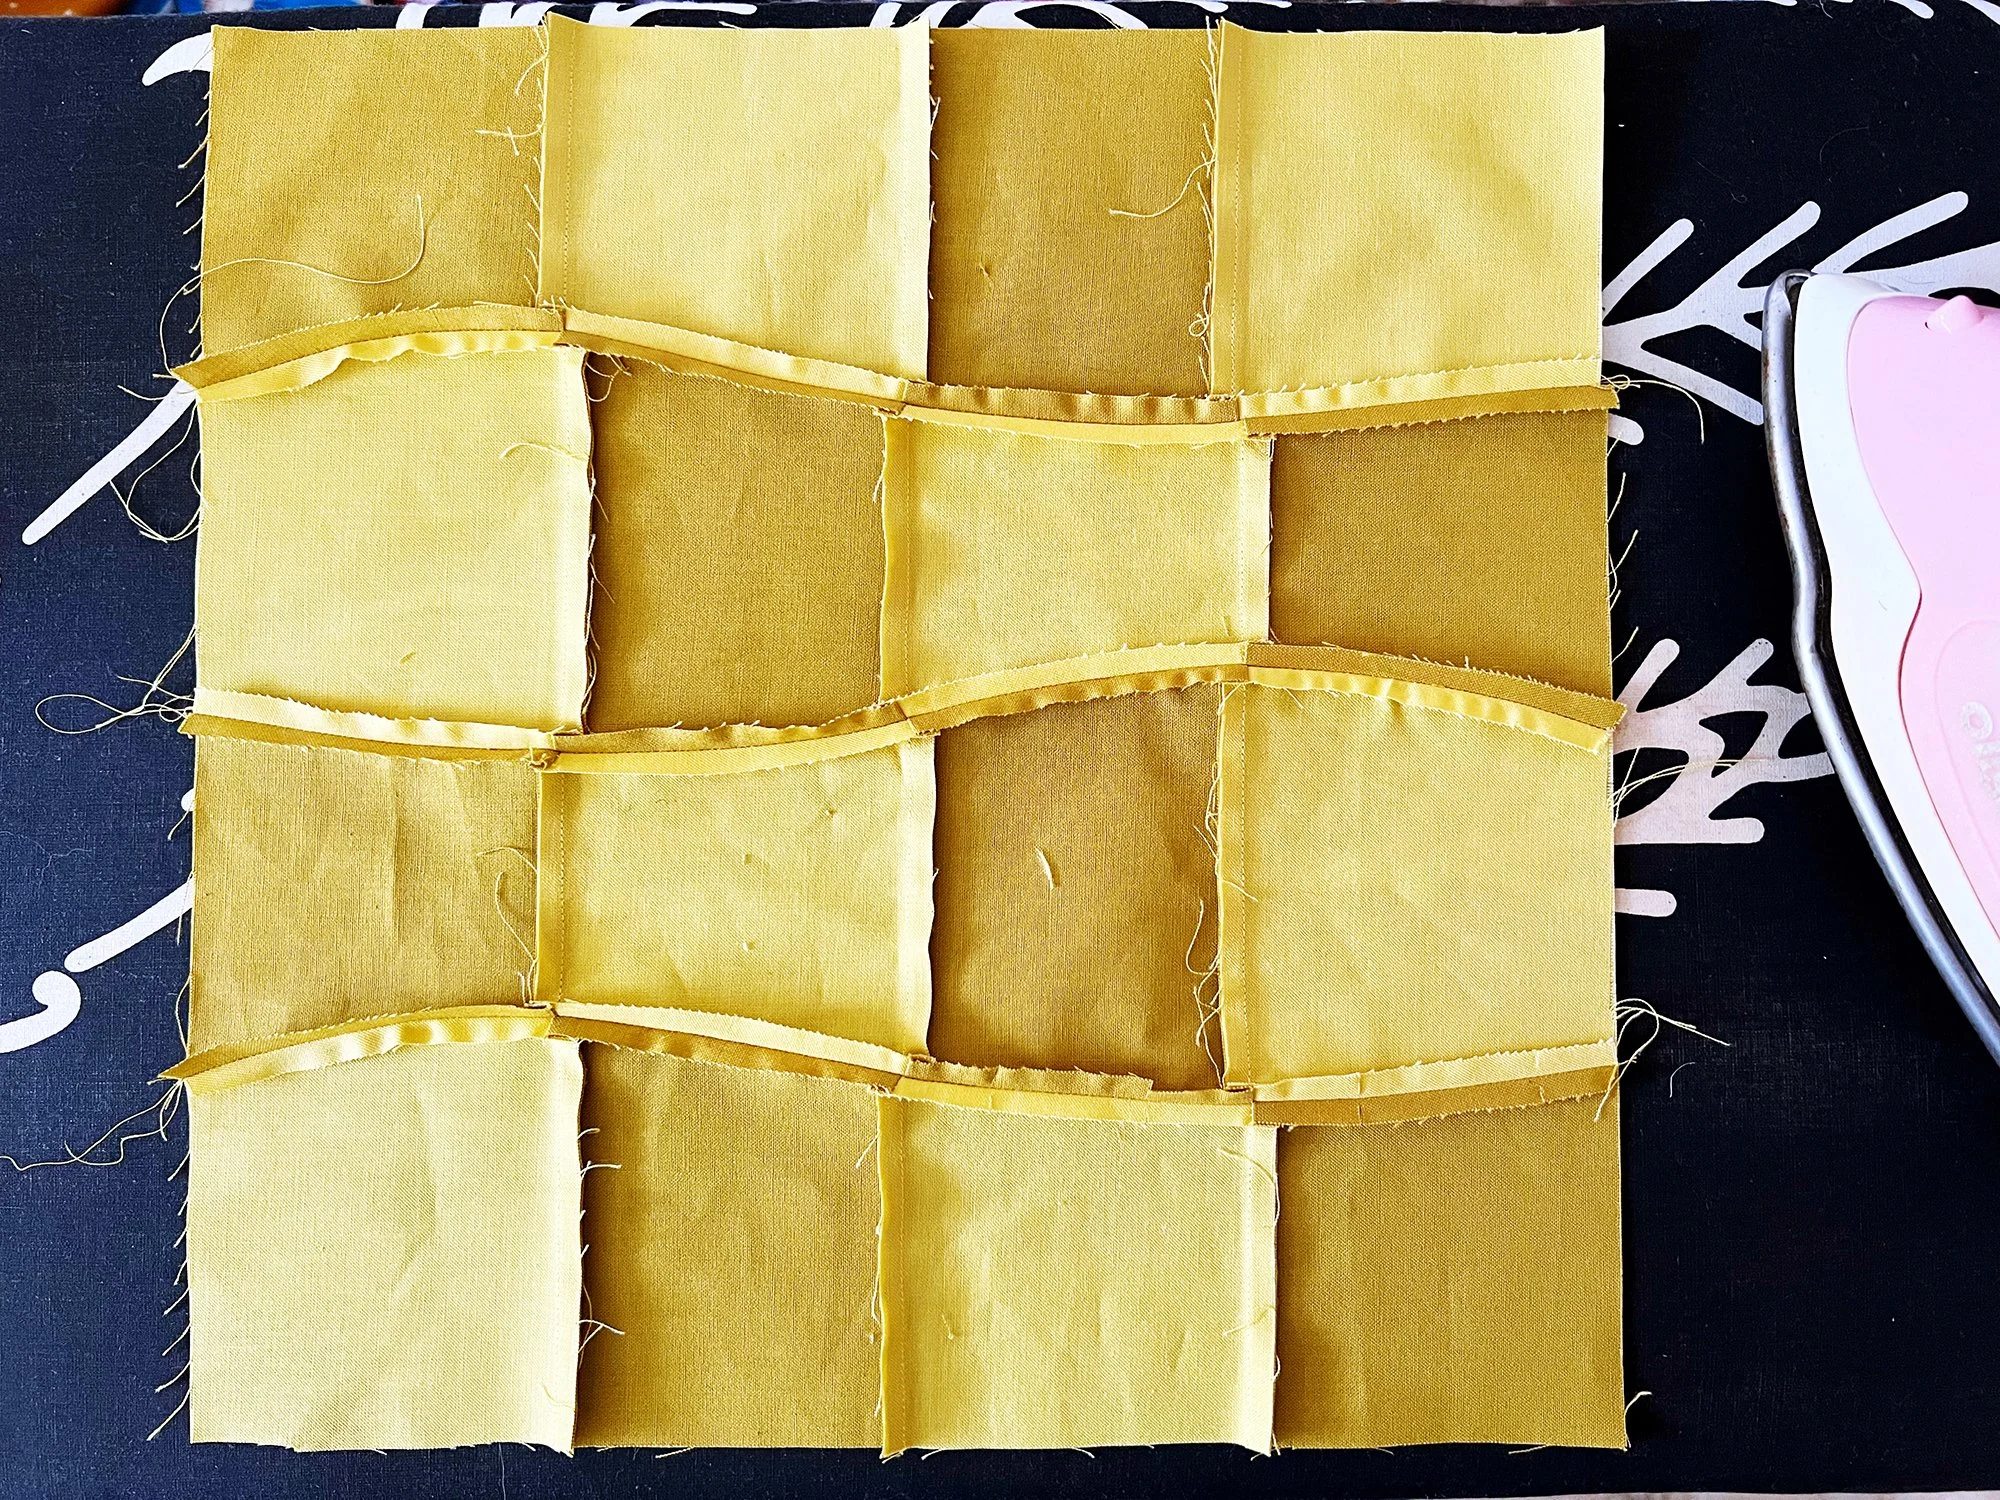
Press each of the curvy seams open. This might feel tedious but I have found the blocks lay so much flatter and nicer when pressed open. Press the seams open with the tip of the iron from the wrong side, then flip over and press from the right side with a spritz of pressing spray or water.
TRIM BLOCKS (ALL VERSIONS)
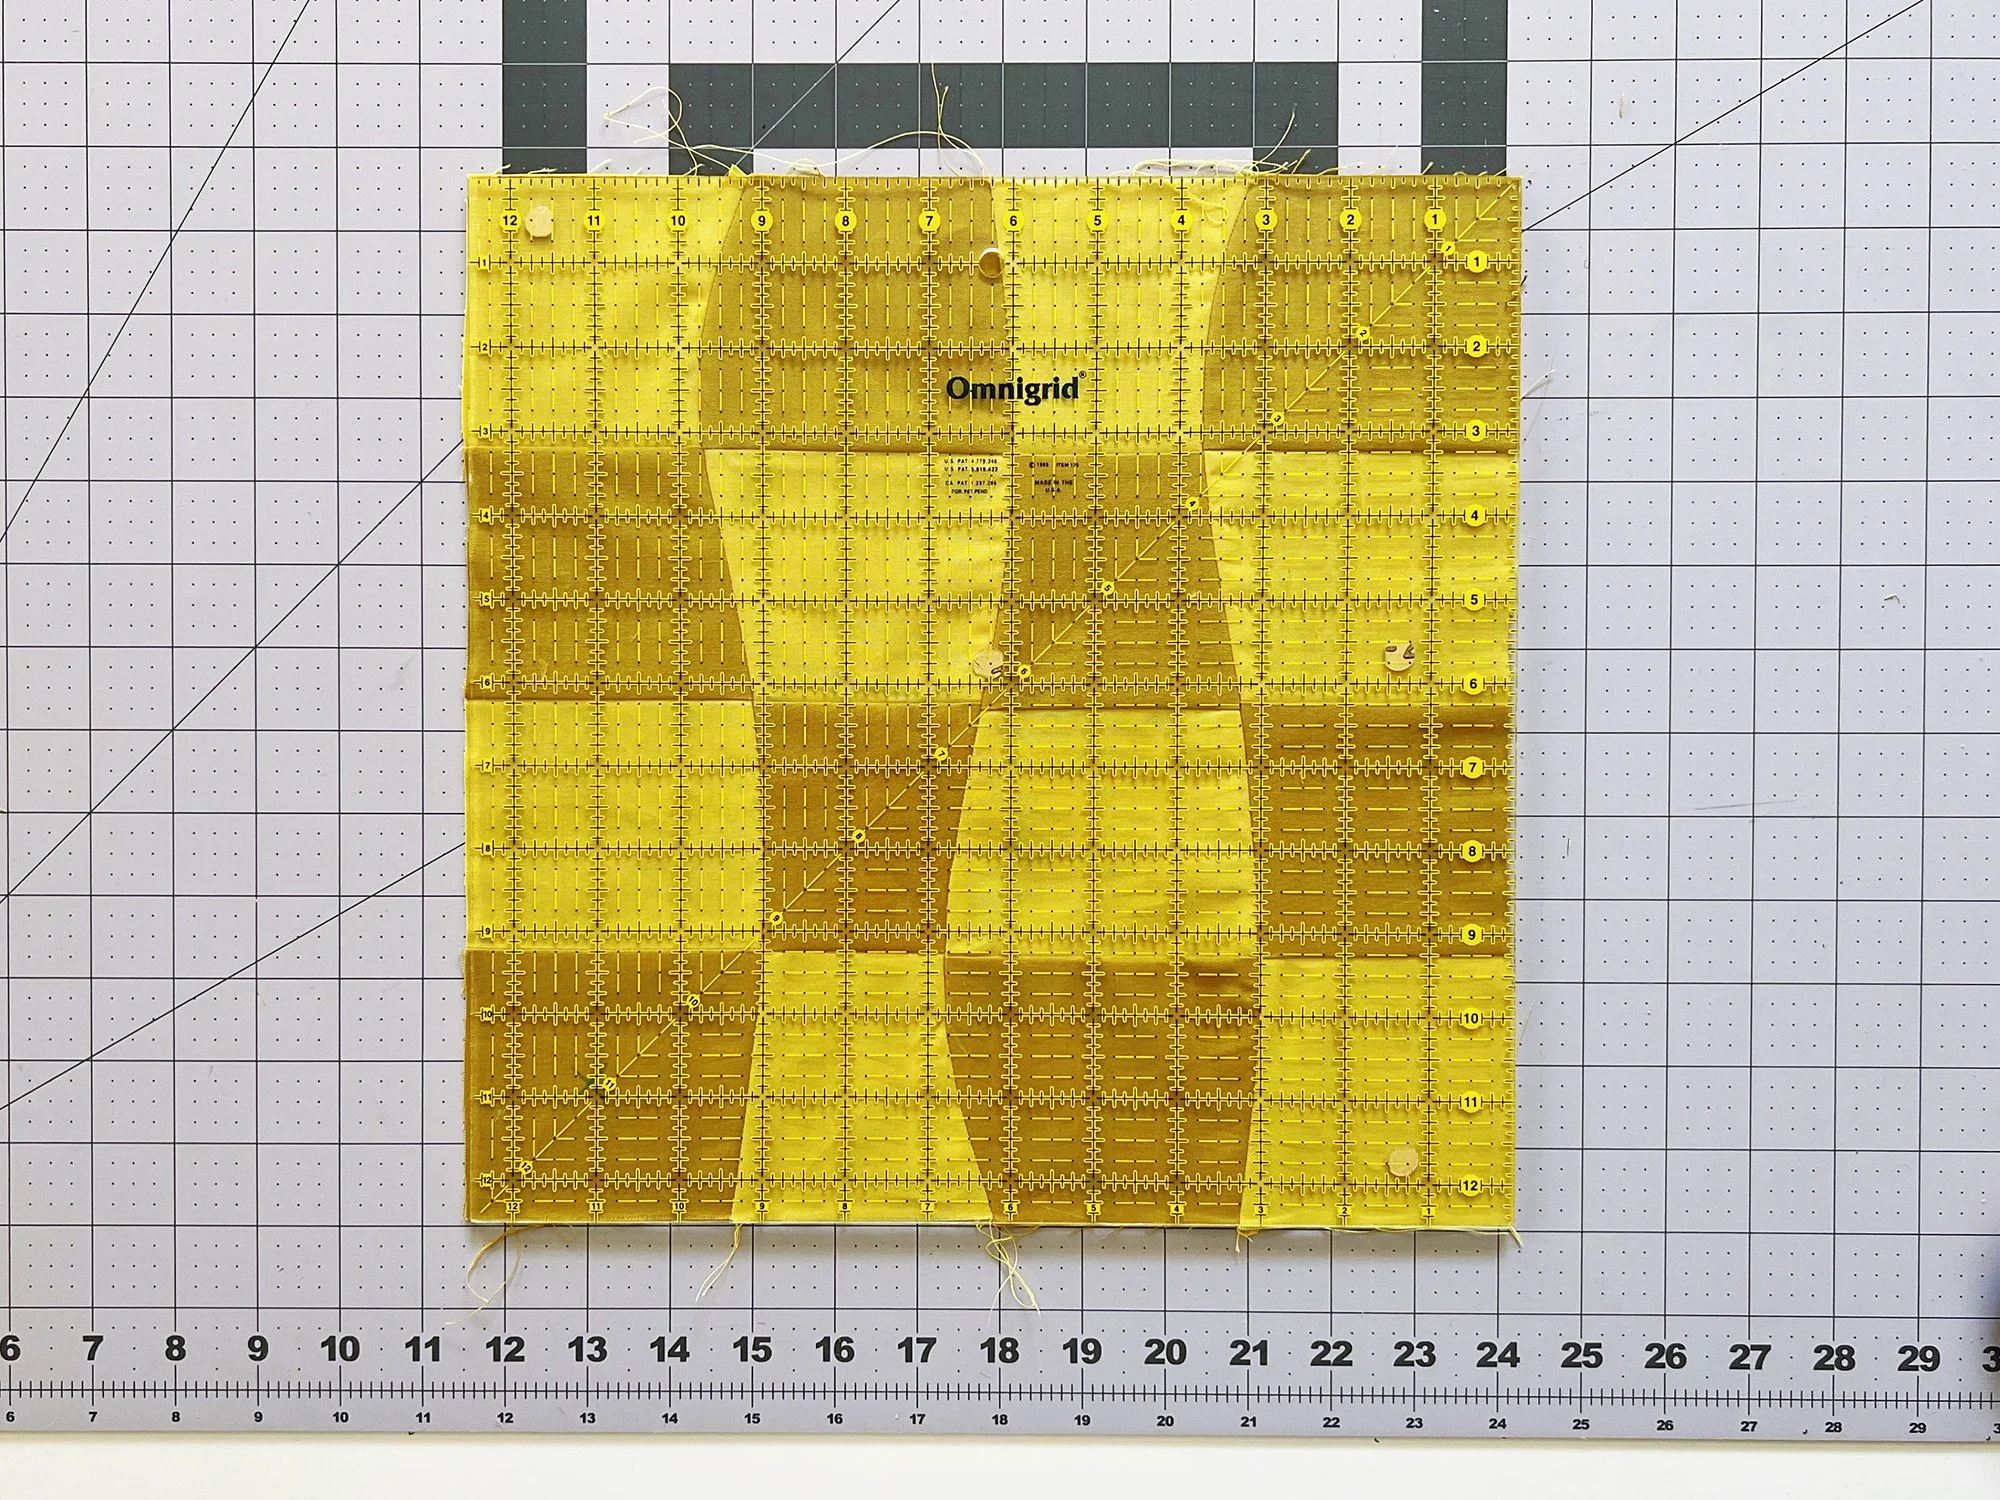
We will be trimming all our blocks to 12.5” x 12.5”. They should be pretty close to this, and the trimming is really just to even up edges and square up anything that got a little wonky. It will also conveniently take care of any fraying threads, thread tails, and dog ears (the little triangles of seam allowance sticking out on the curvy seam allowances).
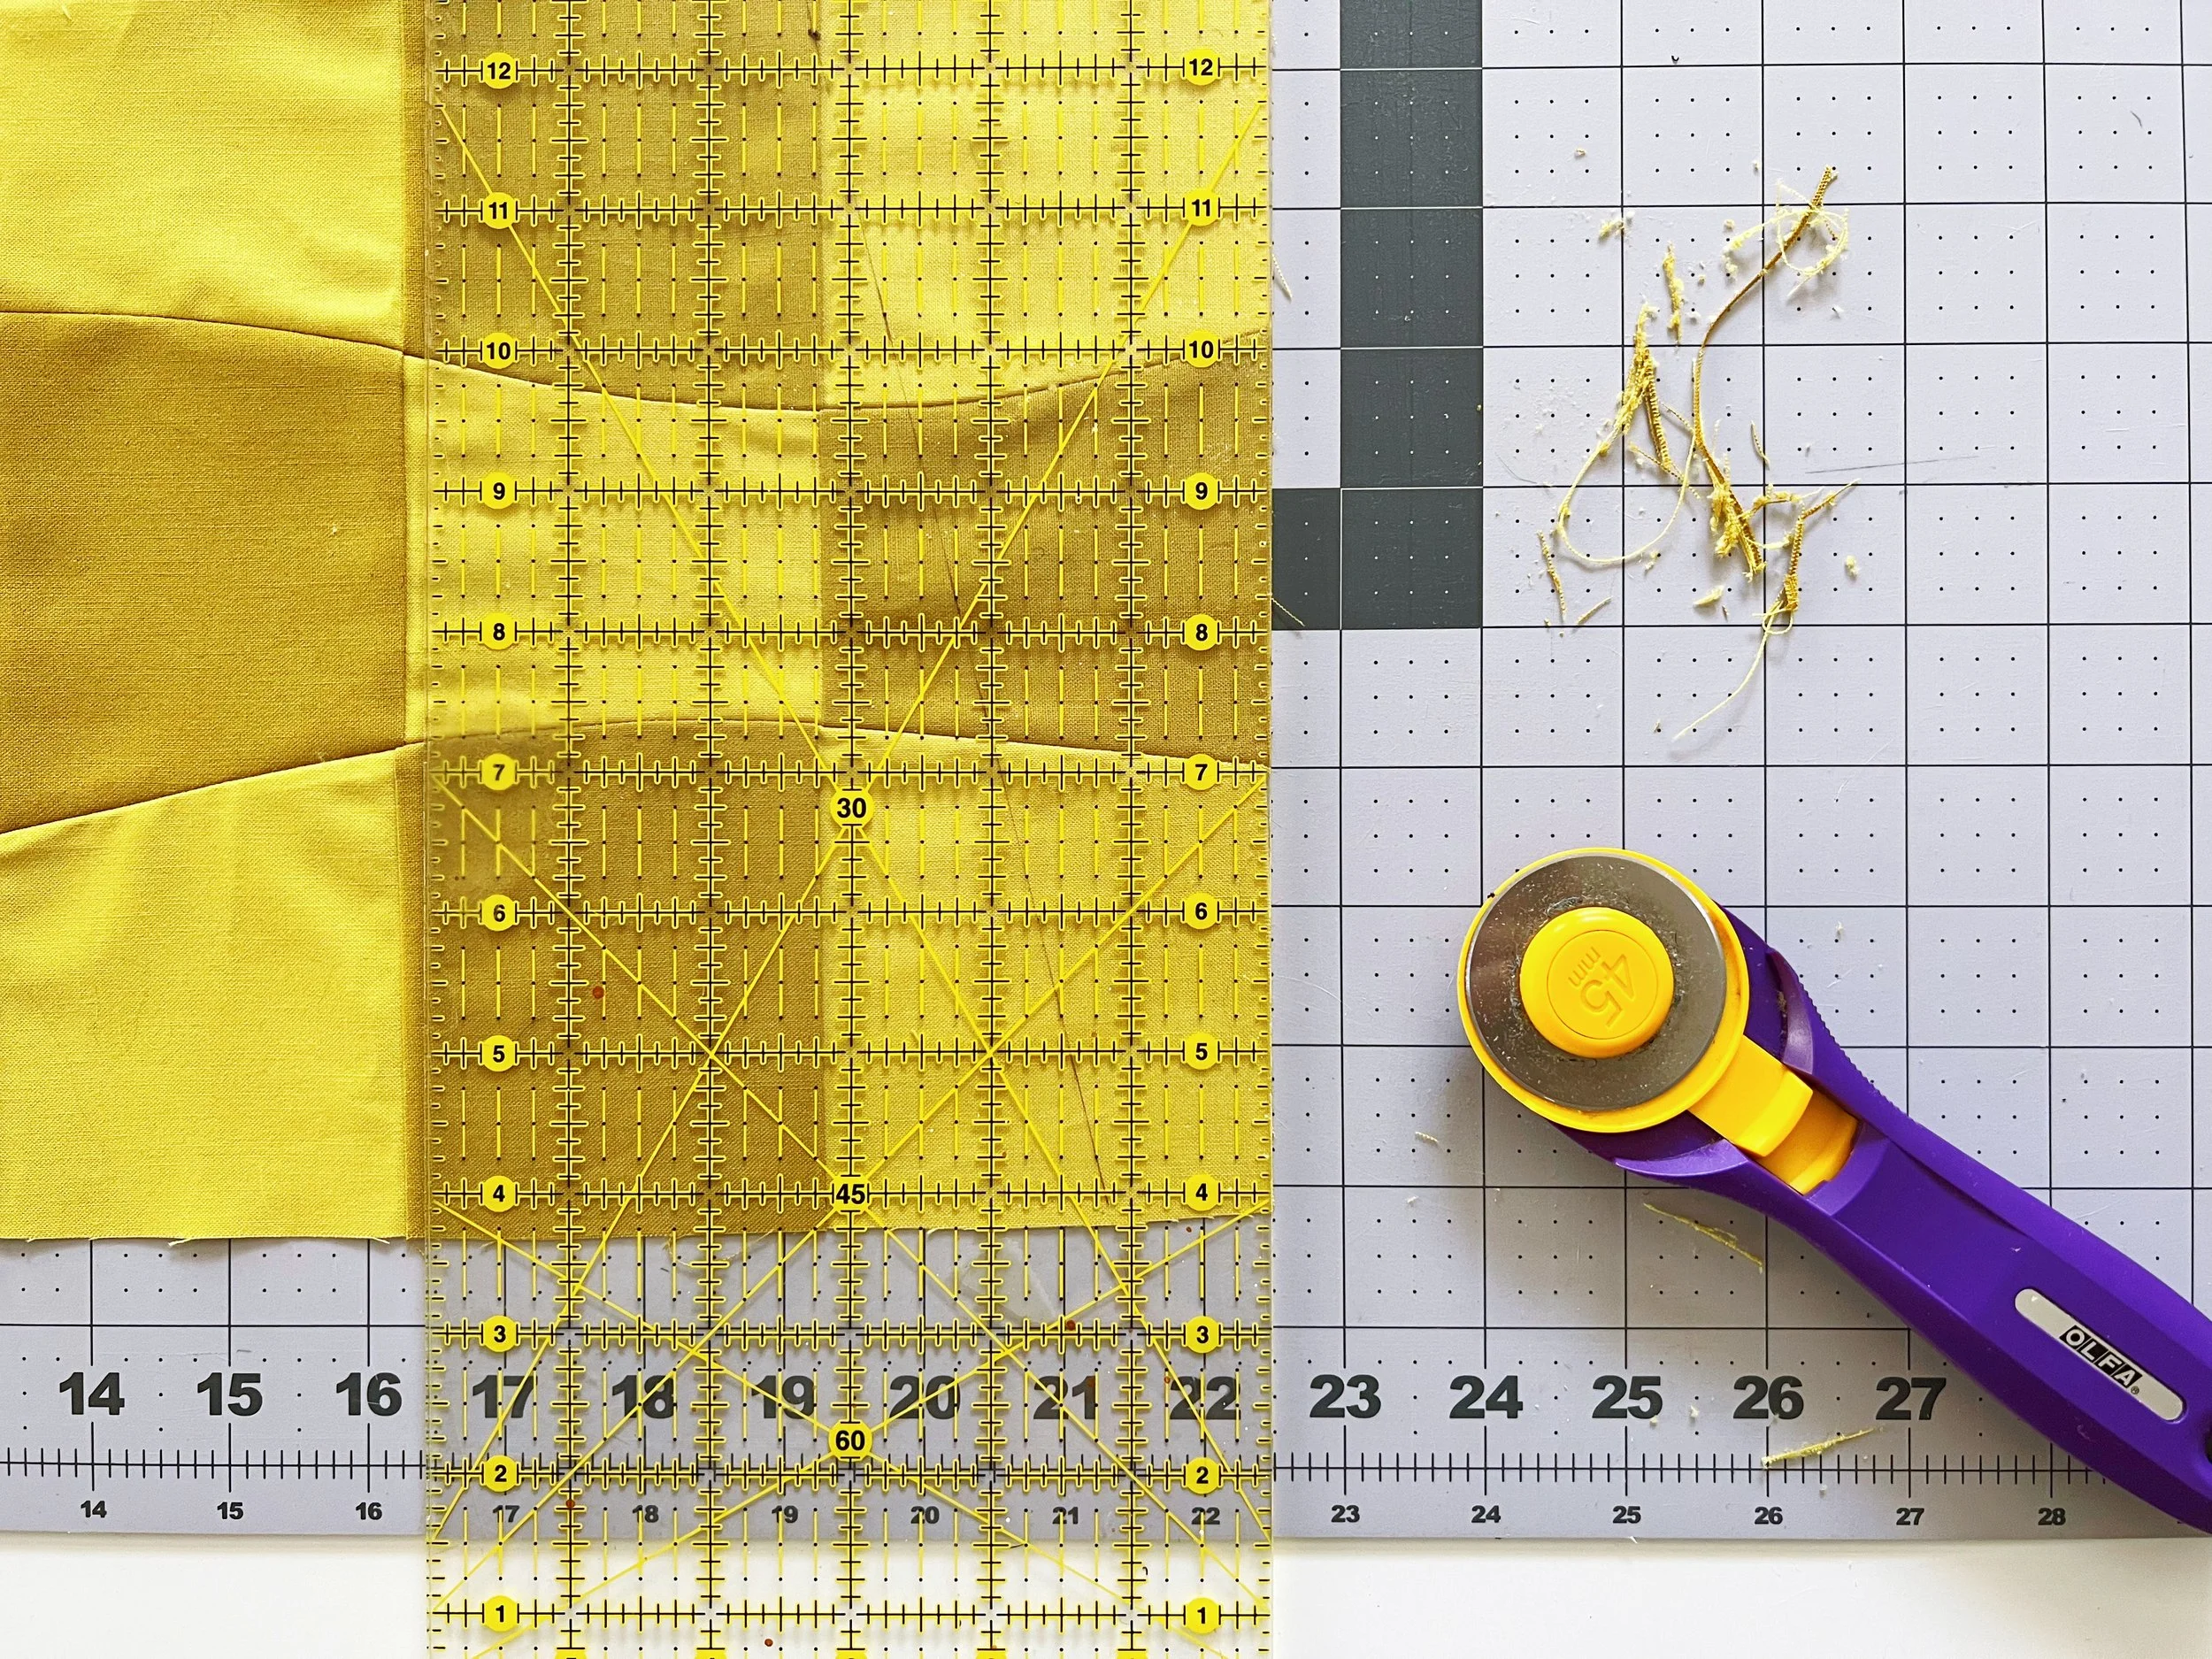
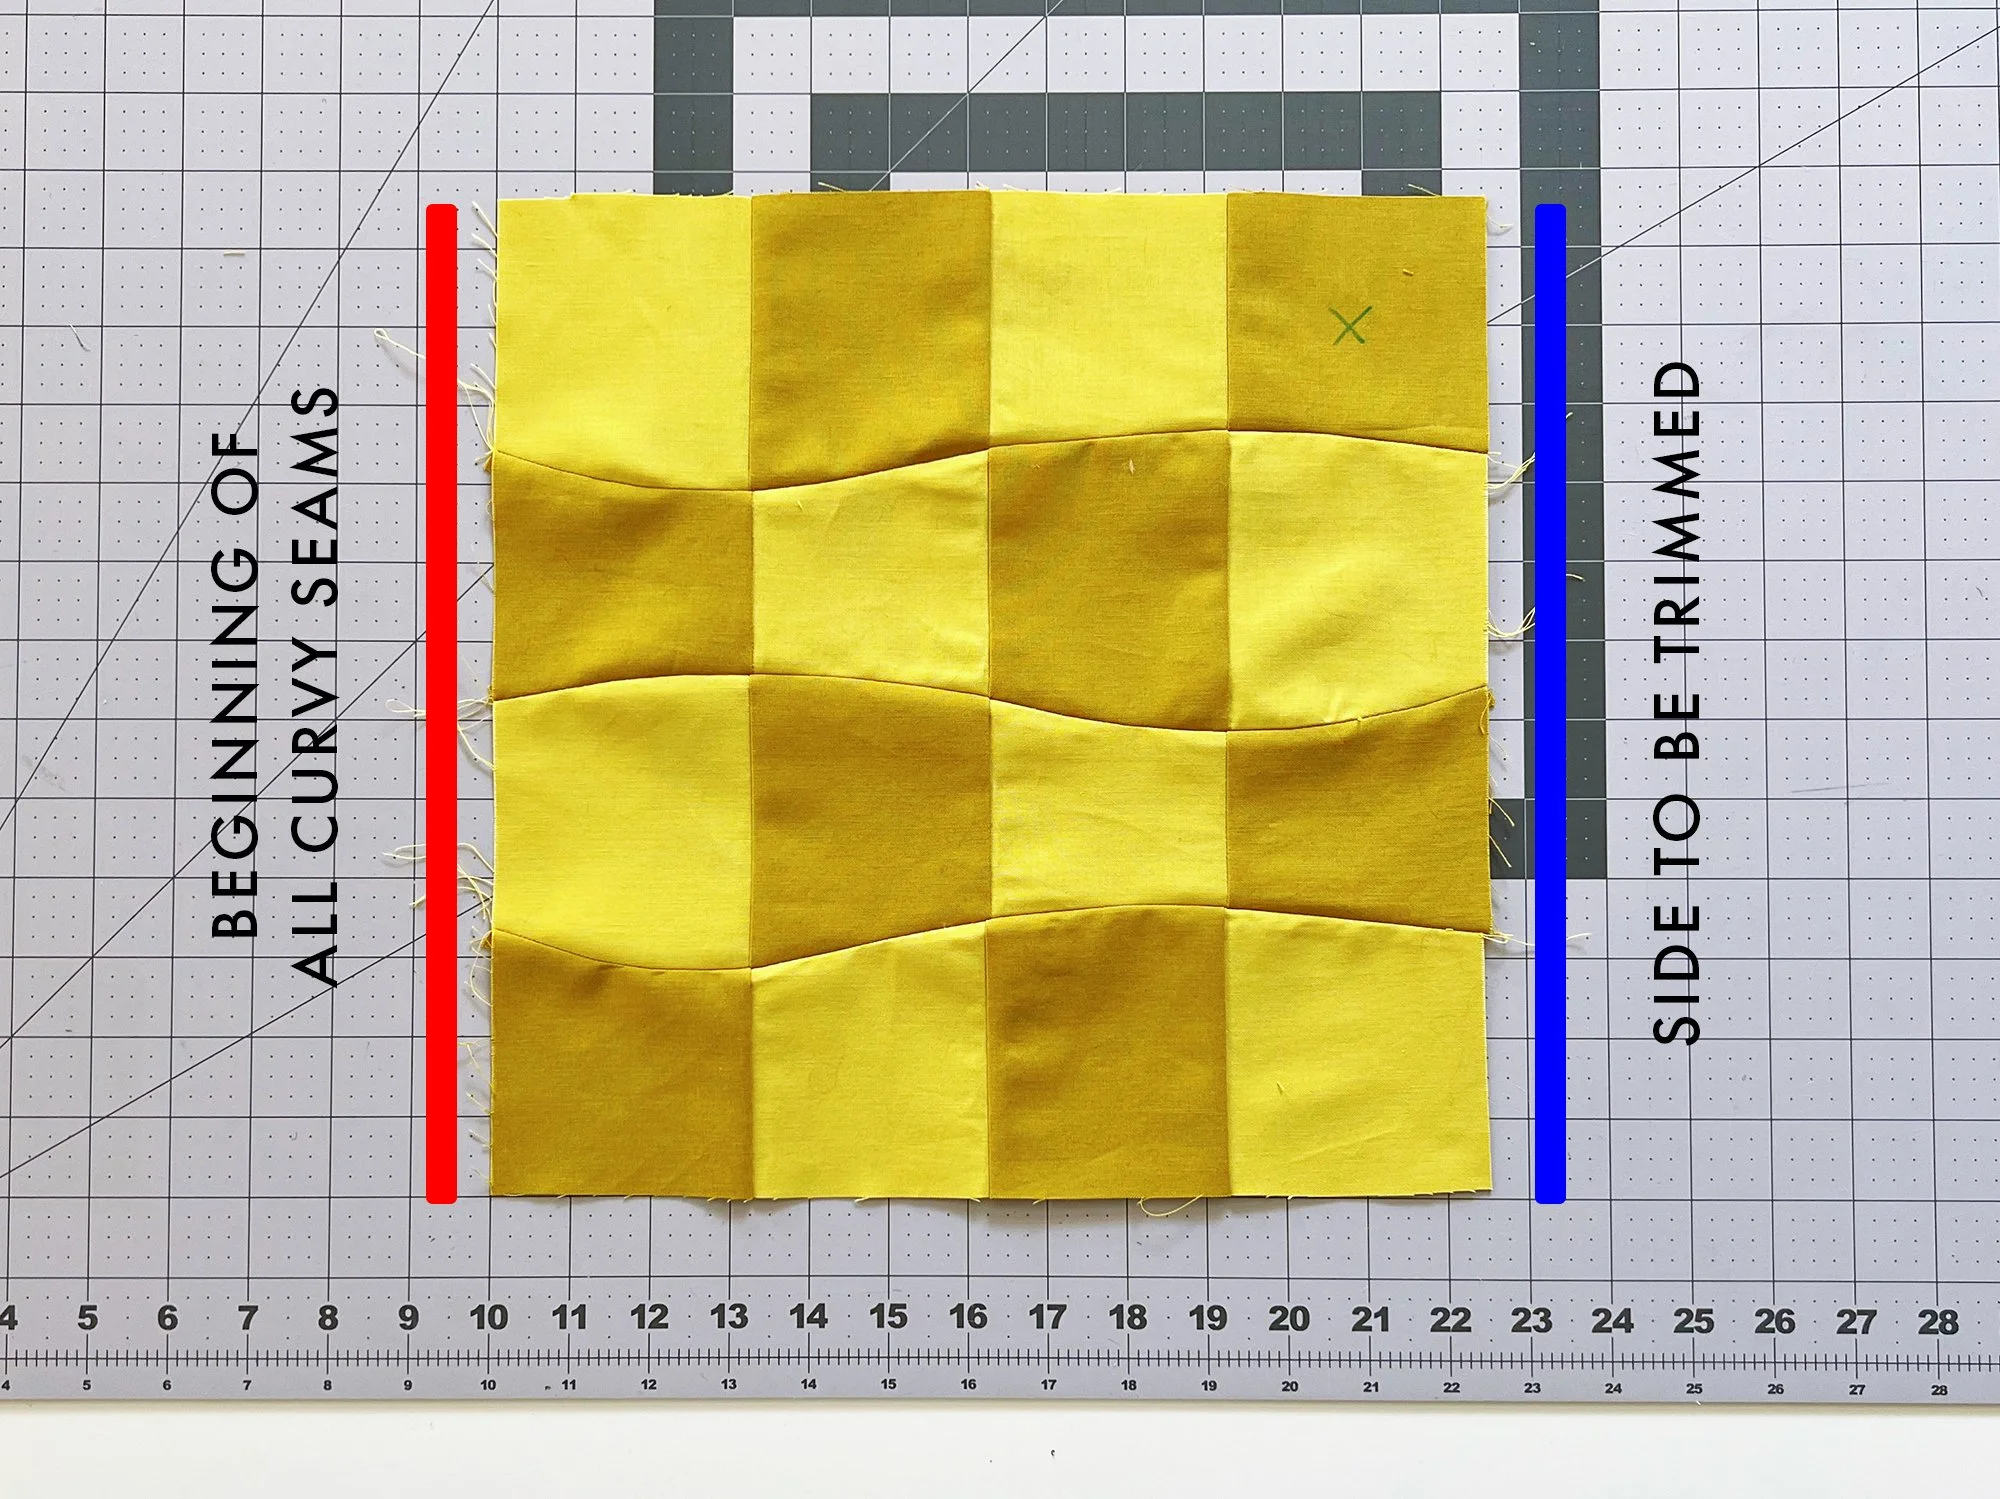
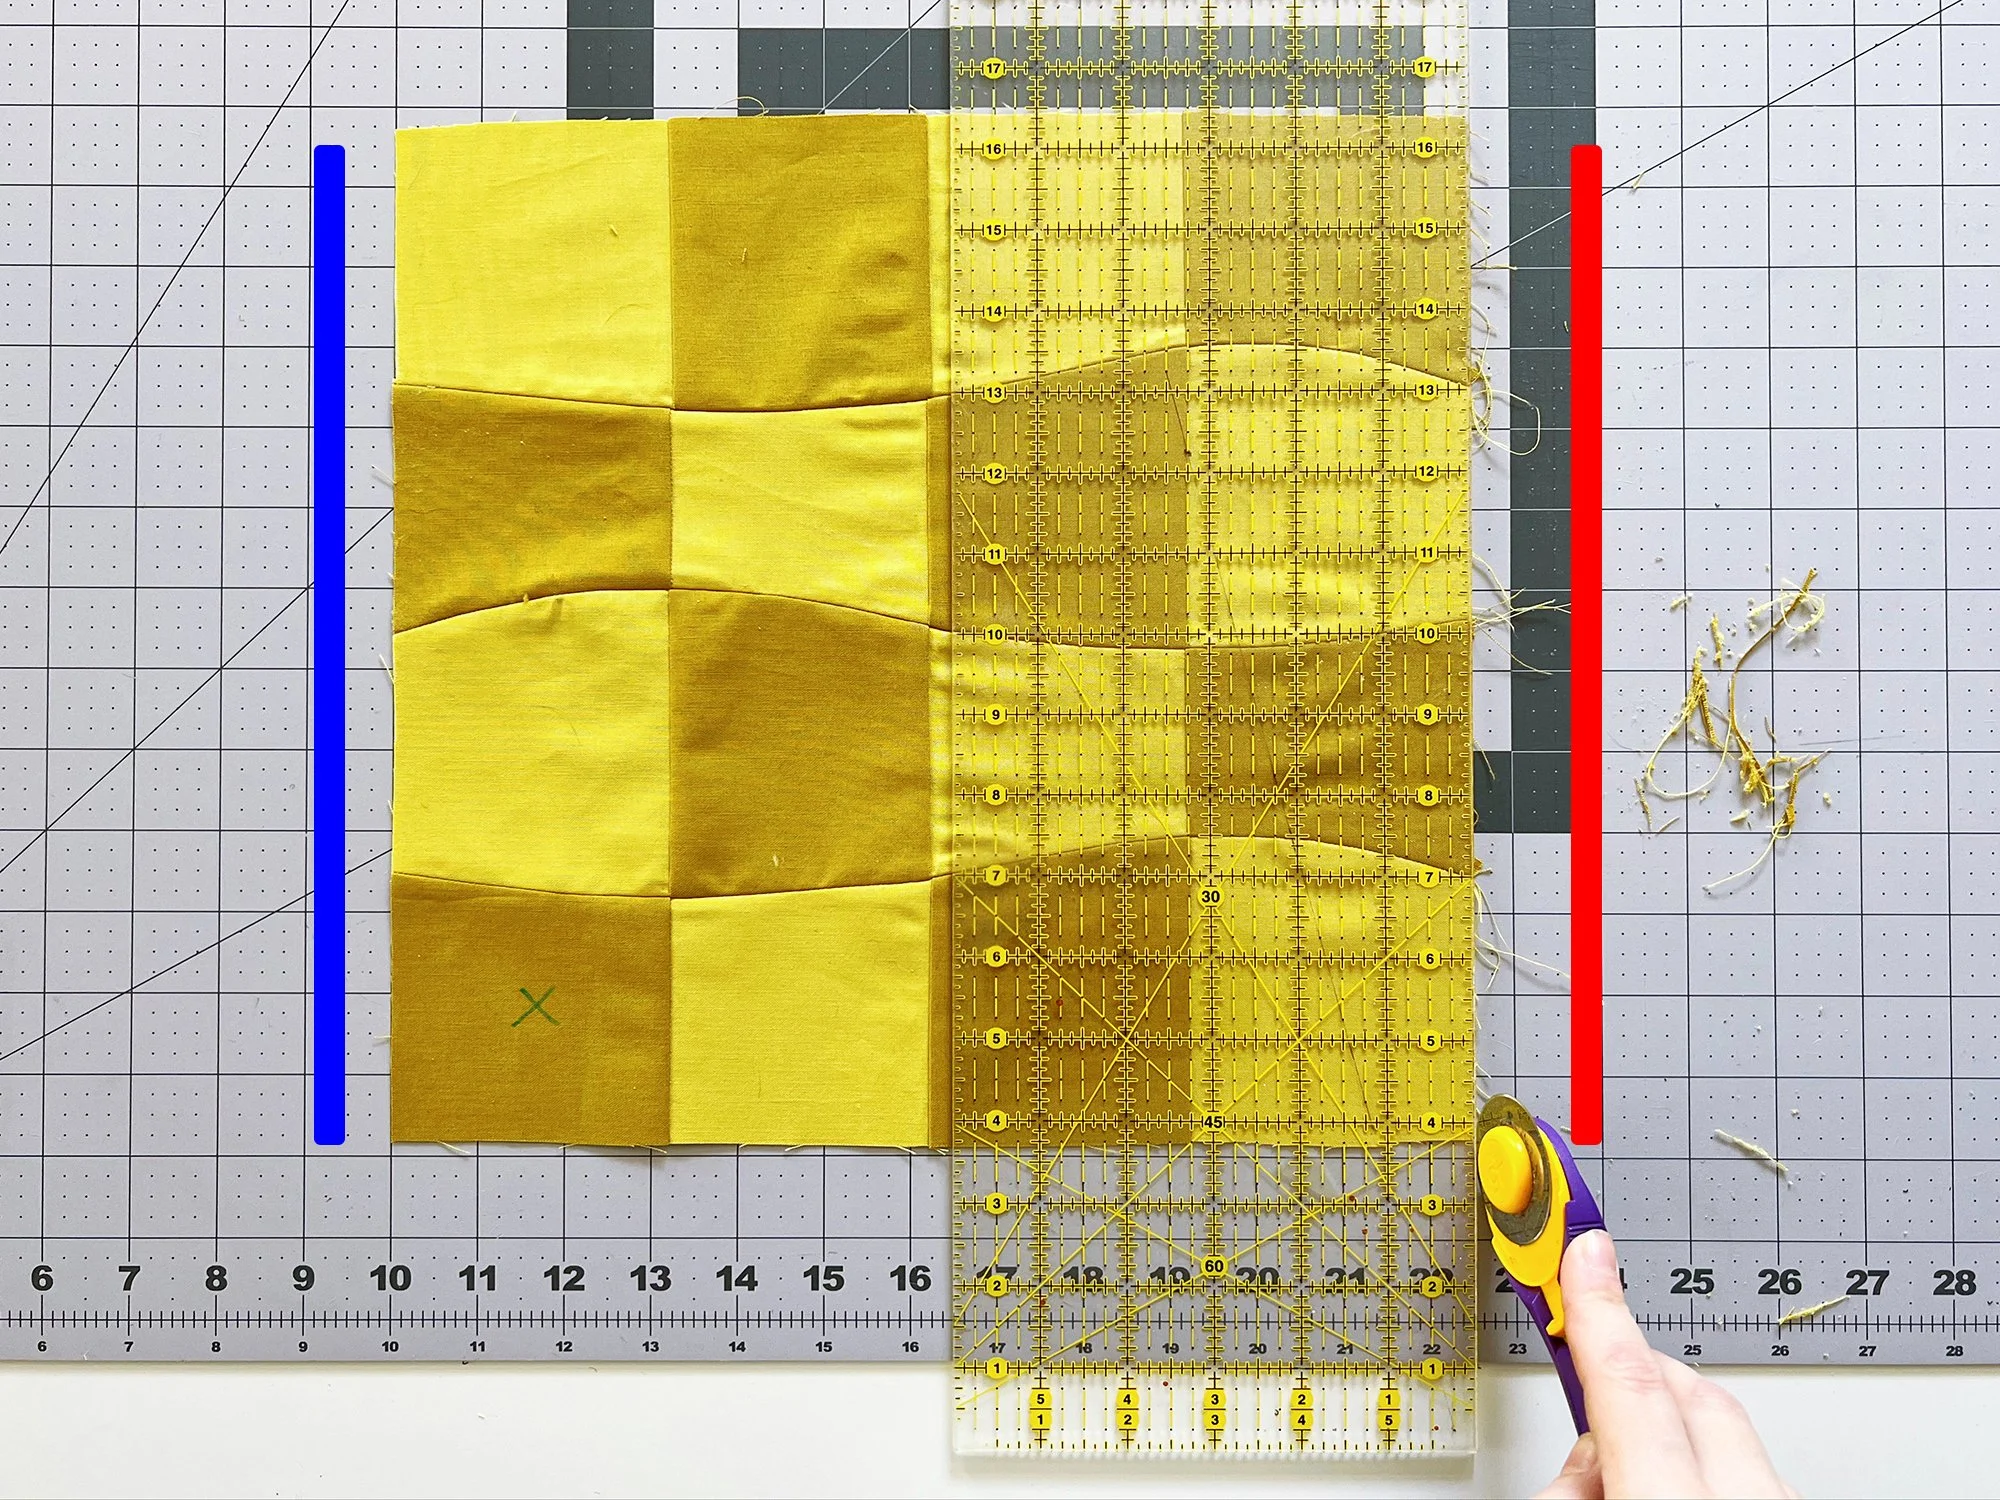
Place a pressed block on your cutting mat. I like to work in the center and use the vertical 10” line as my “0” so I have plenty of space on each side. In the photos below, you’ll see me using 10” as 0” and 22.5” as 12.5”. I will be referring to them as 0” and 12.5” in the text. Your 0” should be on the left, and your 12.5” should be on the right.
Locate the edge on your block where you started all your curvy seams. This edge should be pretty lined up, since you were able to position the fabric at the beginning of the seam (as opposed to the other side, where it might have drifted a little by the end). Place this edge juuuuuust at/over the vertical 0” line. This should put the opposite edge juuuuust at/over the 12.5” vertical line. You’ll want to check both sides and if your block is a little bigger than 12.5”, make sure it’s overhanging both the 0” and 12.5” lines evenly. If you have any raggedy edges, make sure the shortest part of the raggedy edge is at least touching the 0” or 12.5” line (depending which side it’s on). We’ll be trimming at the 12.5” line first.
In the following photos, I have designated each edge of the block with a color, to hopefully help make it clear what’s going on as we work through the photos.
Keeping your block in position, put your ruler over the right edge (blue) of the block and trim at the 12.5” line. You might be barely trimming anything off, just a few fabric crumbs.
Rotate your block 180° so that your freshly trimmed edge (blue) is now at and lined up with the 0” vertical line. You want it at the line, not overhanging. Trim the opposite edge (red) at the 12.5” vertical line.
We have two edges trimmed! Now, rotate the block 90° (doesn’t matter which direction) so that your trimmed edges (red and blue) are at the top and bottom. Since we know those edges are straight and parallel, we are going to line those edges up with the horizontal lines on our cutting mat (doesn’t matter which) to make sure the final two edges we trim are square in relation.
Just like before, overhang the untrimmed edges of the block juuuuust past the 0” and 12.5” vertical lines on the mat. Make sure the overhang is roughly even. Remember to keep the top and bottom edges (red and blue) parallel to the horizontal lines on the mat. This might mean your untrimmed edges are a little crooked, but that’s ok, we’re about to make them straight.
Keeping your block in position, trim at the vertical 12.5” line (green edge).
Rotate the block 180 and line up the freshly trimmed edge (green) with the 0” line. Trim the opposite edge (pink) at the 12.5” line.
Your block is trimmed! Repeat for all blocks.
One final note - you can actually buy a 12.5” x 12.5” acrylic ruler, which is the exact size we are trimming our blocks. However, I found that because you’re really not trimming much off at all, it felt more cumbersome and difficult to use this ruler than the rotate and trim method described above. But if you have a 12.5” square ruler you could always try it and see how you feel.
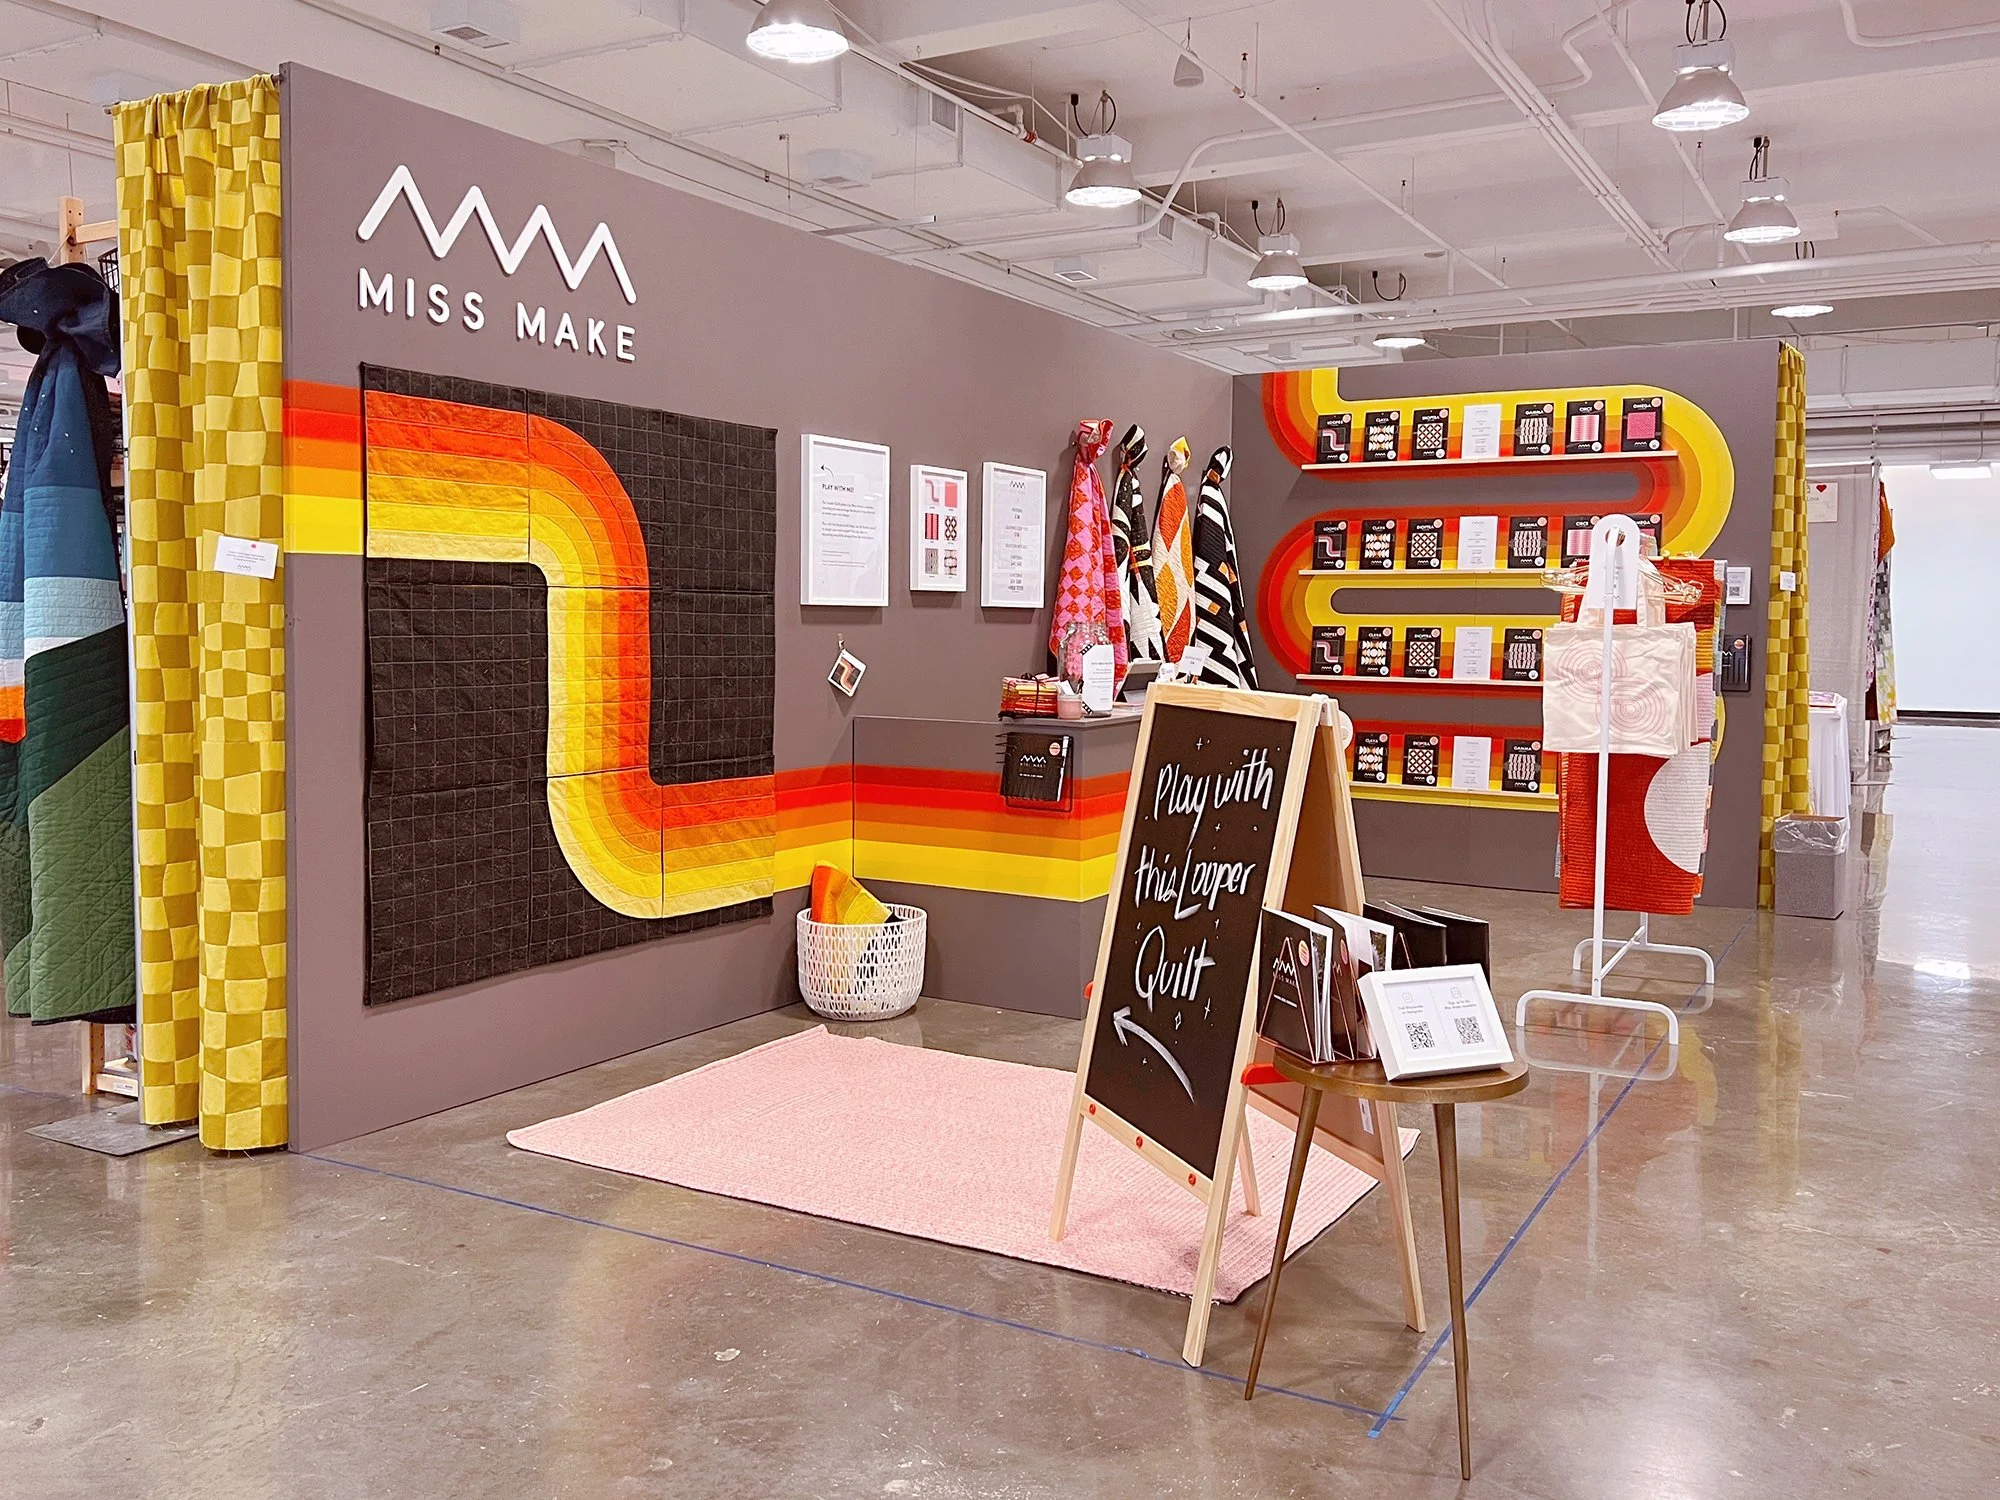
I also wanted to share a glimpse of these yellow blocks in action. I’m still going to be making a king sized Omega with them, but in the mean time I had the idea to use some of the blocks as curtains for the sides of my QuiltCon booth. They covered a space behind my walls where I stored stuff. For each curtain, I sewed together the blocks for three columns of the king size layout. I staystitched around the outer edges so the weight of the curtain hanging wouldn’t stretch out the raw edges or start pulling apart the seams. To make it into a curtain I just folded the top edge over a dowel and safety pinned it. It worked out great, and now I’ll just sew the two curtains together and add four more columns to finish the king size quilt!
Fabrics are Moda Bella Solids in Maize and Bronze and they are the best greeny citron yellow!
CHECKLIST
Here is your checklist for the week. If you have a question, please comment below (rather than commenting on Instagram or DMing) because I’ll definitely see it, plus everyone else can see the answer too!
Clip all curvy seam allowances (carefully!)
Press all blocks with curvy seams open
Trim all blocks to 12.5” x 12.5”
Catch up on anything you’re behind on, or just rest!
PRIZE & DISCOUNT INFO
Now the good stuff! To enter to win the weekly prize, post a photo in your grid on Instagram this week using the hashtag #omegaqal. It can be a photo of your cut pieces, your favorite scrappy block, anything Omega related! One winner will be randomly selected from the hashtag to win a $100 gift card to Sewing Arts and three Sew Fine Thread Glosses. Post in your grid, not stories. Your profile must be public for the hashtag picker to see your photo. Open worldwide. You can post to enter multiple times but if you do they must be different photos (no spamming!). Post between 8:00am Feb 27 and 11:55pm Mar 5 (EST) to enter.
FABRIC/SUPPLIES DISCOUNTS
Everyone can get in on these discounts!
Taralee Quiltery: Use code OMEGA for 25% off patterns and fabric (merch excluded). One use per customer, no expiry.
Sew Fine Thread Gloss: Use code OMEGA25 for 25% off! (Please note checkout shows prices in CAD)
LONGARM QUILTING DISCOUNTS
These discounts are available throughout the whole quiltalong. Dig out those languishing quilt tops and send them away to be finished, and make plans for your future Omega!
Autumn Moon Quilting: Use code OMEGA for 10% off longarm services. Code valid Jan 30 - Mar 5.
Stitch Lab Quilting: 20% off longarm quilting services (batting and binding separate). Use code OmegaQAL23 on booking form. Offer expires June 6, 2023.
Thai Charm LLC: All Omega quilts sent Jan 30 - April 12 will automatically get 25% discount. Participants just need to mention the quiltalong when they fill out the quilting form.
Wild Phil Quilting: 20% off edge to edge longarm quilting services on any Omega top. Use code Omega20 when submitting form. Offer valid through May 5, 2023.

